Introduction to Community Access
Administrators can configure each role's access to the user profile and the Startup profile. This ensures that different users have appropriate visibility and permissions based on their roles.
Getting to Community Access Settings
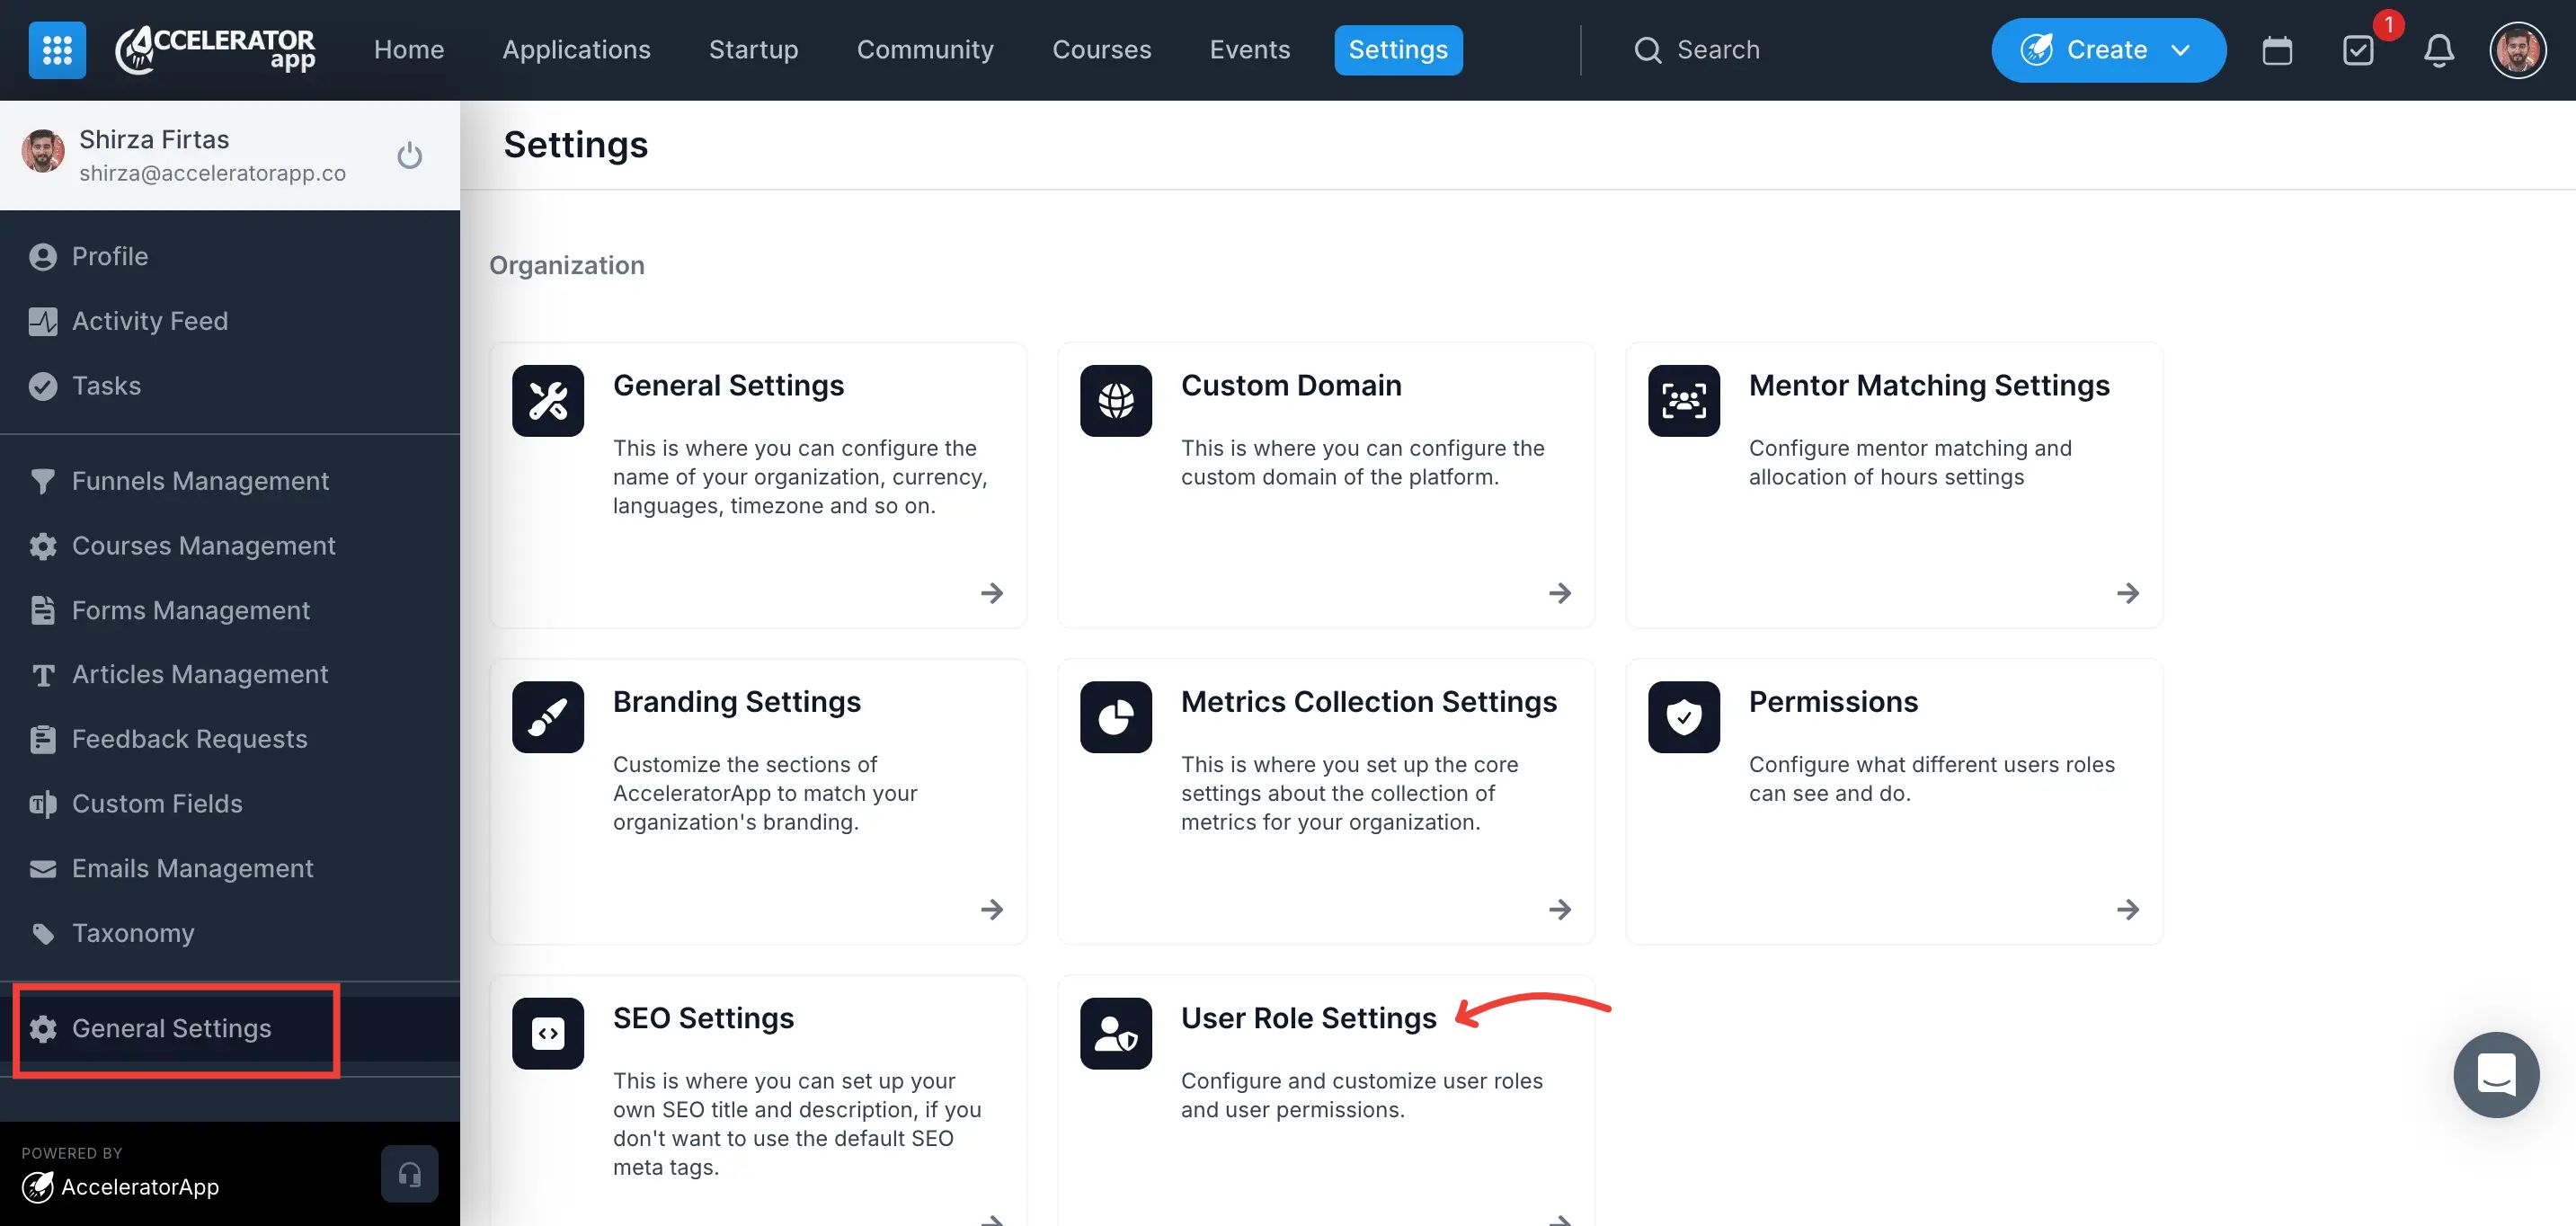
To manage these permissions, as administrator you have to navigate to General Settings and click on the User Role Settings section.
Step-by-Step Actions
Step 1. Go to General Settings in the platform.
Step 2. Click on User Role Settings.

Step 3. Review the default and custom user roles listed.

Step 4. Click on one of them and scroll down to the Visibility Settings section.
Step 5. Customize the visibility settings to define access levels for startup profiles and user profiles by user role or assigned users.

Useful Tips & Common Cases
- Default Roles: These roles come with pre-set permissions and cannot be edited except for community permissions that can be edited as needed.
- Custom Roles: If your organization uses custom user roles, you can adjust their visibility settings as needed.
- Best Practice: Ensure users have the appropriate level of access. For example, you can restrict access to other user's profiles for applicants to prevent early interactions with mentors.